PERMISSION NUMBERS
Permission numbers permit students to enroll in a course even if they do not meet the pre-requisites or the class is full. The academic department determines who issues and receives permission numbers based on departmental and college polices. Enrollment Services does not generate or issue permission numbers. Faculty and staff may request access to generate permission numbers by completing the Security Access Request form.
To generate permission numbers:
1. Log in to e-Campus
2. Navigate to Records and Enrollment -> Term Processing -> Class Permissions -> Class Permissions
3. Enter your course information and click “Search.” To the right of most boxes is a magnifying glass. Clicking the magnifying glass will show a list of options for that box. Ensure you complete the term box and the term is correct.
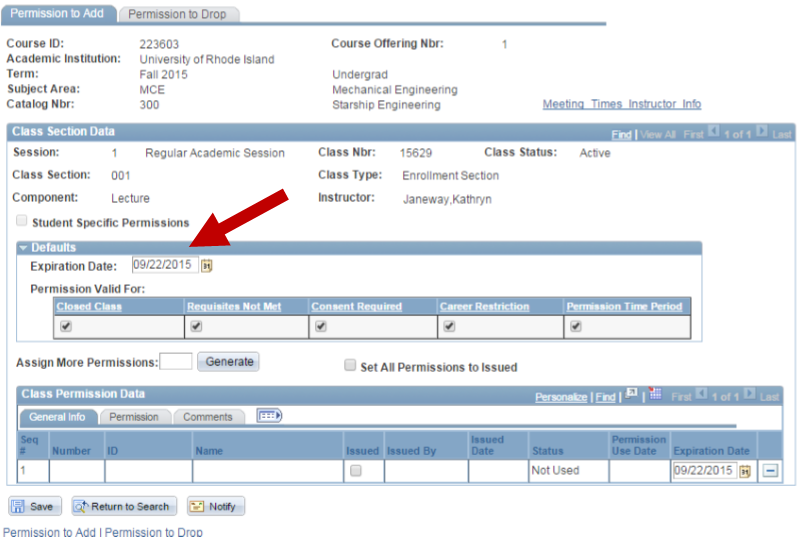
4. Ensure you have the correct section. To find your section, click the “Find” button to the far right of class section data (see below).

5. Check the “Expiration Date.” This is the date the permission numbers will stop working (see below).
6. Next to “Assign More Permissions” enter the number of permission numbers you wish to generate.
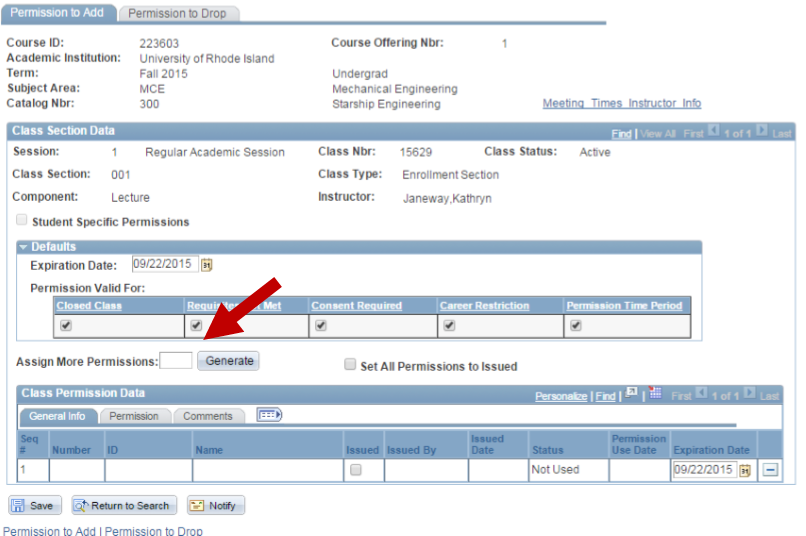
7. Click “Generate.”
8. Permission numbers appear under “Class Permission Data.” Each permission number may be used only once.
9. Click Save.
10. Repeat steps 1-9 to generate additional permission numbers.
OBTAIN PERMISSION NUMBER
Permission numbers allow students to enroll in a course despite not meeting the pre-requisite requirements or if the class is full. In some colleges, permission numbers are provided by instructors to students, in others the dean’s office provides them.
Permission numbers may be used only once and expire on the set date. Enrollment services does not generate permission numbers. To have permission numbers generated, please contact your department chair or dean’s office and refer to instructions on how to generate permission numbers.
To view permission numbers
1. Log in to e-Campus
2. Navigate to Records and Enrollment -> Term Processing -> Class Permissions -> Class Permissions
3. Enter your course information and click “Search.” To the right of most boxes is a magnifying glass. Clicking the magnifying glass will show a list of options for that box. Ensure you complete the term box and the term is correct.
4. Ensure you have the correct section. To find your section, click the “Find” button to the far right of class section data (see below) or use the right and left arrows to the right of find. Note that classes do not appear in order by section.
5. Permission numbers appear under “Class Permission Data.” Each permission number may be used only once. Note the Expiration Date to the right of each number.
6. If you plan to issue a permission number, check the box under “issued” to the right of the number (see below). Then click save.

VIEW ROSTER
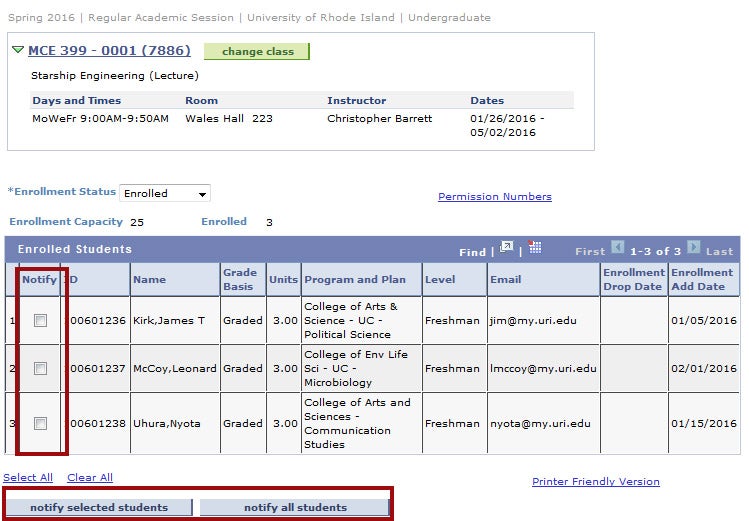
Your roster shows students enrolled in your class as well as their majors and contact information. You will only see rosters for classes that have at least one student enrolled and for which you are listed as the instructor in e-Campus.
1. Log in to e-Campus.
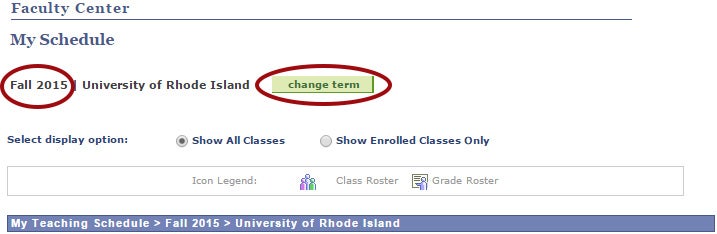
2. Scroll down to Faculty Center. Ensure you are viewing the correct term. If not, click the green change term button to change terms.
3. Under “Faculty Center” click the Roster icon next to the appropriate course.

4. The class roster appears. You can see major, academic level, email as well as add and, if applicable, drop dates.
Communicating with students directly from your Roster
1. To email all students, click notify all students. To email some students, check the box to the left of the student(s) you wish to email. Then click notify selected students.
2. Compose your message
3. Click Send Notification
DROP POLICY
The University’s policy for dropping a student from a roster can be found in section 8.33.13 of the University manual.
Faculty drop requests will only be approved prior to the late withdrawal period, as indicated in the Academic Calendar as the last day for students to drop courses. After this point, all drop requests must be approved by the faculty member and academic dean of the student’s college. Please see section 8.34.10 in the University manual.
Instructions
If as an instructor you wish to drop a student or students from your class roster in accordance with the University policy referenced above, you can send an email from your @uri.edu address to esfacultydrop@etal.uri.edu, with all the following information:
- Course number
- Section
- Name(s) and ID#’s of the students you wish to drop
REQUIREMENT CHECK
Students are permitted to enroll in a class if they have “conditionally” satisfied the pre-reqs. For example, MCE 301 requires a C in CVE 220. If a student is presently enrolled in CVE 220 and seeks to enroll in MCE 301 for the following semester, the system will assume the student will complete with a C or better and allow enrollment.
To identify students who did not complete the pre-req successfully, Enrollment Services offers the Post Enrollment Requirement Checking (PERC) tool to authorized users, which are department chairs and deans. To request access, please first seek approval from your dean’s office. If approved, complete a Security Access Request Form and ask for “Role USARPREQ.”
Important: The PERC tool requires post enrollment requirement rosters, which are created within three business days after grades are due.
We recommend that departments review PERC after fall grades are posted (early January), after J term grades are posted (late January), after spring grades are posted (late May) and after summer grades are posted (early August). The Provost Office also requires departments to notify students before dropping them. Following the suggested timetable provides dropped students with the time to enroll in an alternative class or to seek reinstatement by proving they have met the prereqs.
To run the tool:
1. Log in to e-Campus.
2. Navigate to Curriculum Management -> Enrollment Requirements -> Post Enroll Req Checking-> Enrollment Requirement Roster.
3. Enter your course information and click “Search.” To the right of most boxes is a magnifying glass. Clicking the magnifying glass will show a list of options for that box. Ensure you complete the term box and the term is correct.
4. On the results screen, click your course.
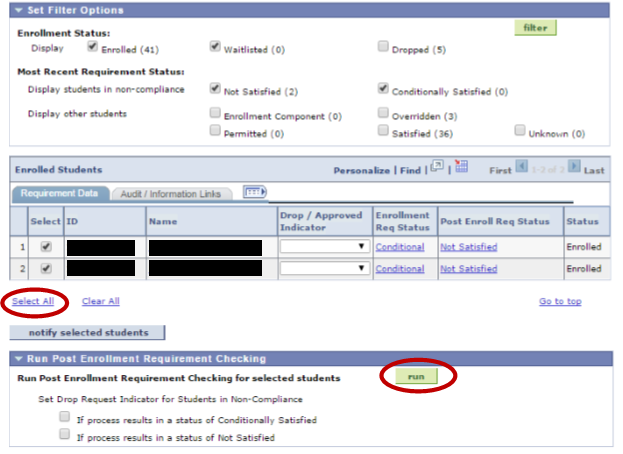
5. Set which students you wish to see on the roster. We suggest checking Enrolled, Not Satisfied and Conditionally Satisfied at a minimum. If you wish to also display students overridden into the course, check Overridden and Permitted.
6. Click the green “filter” button.
7. Click Select All, then click the green “run” button. (see screen shot below.) The roster will refresh. If all students disappear, all students fully meet the pre-reqs.
8. Look under the Post Enroll Req Status column to determine if a student meets the pre-reqs. Clicking the status under the Post Enroll Req Status column will display additional information on the student’s pre-reqs. (The Enrollment Req Status column shows info on a student’s pre-reqs at the point of original registration.)
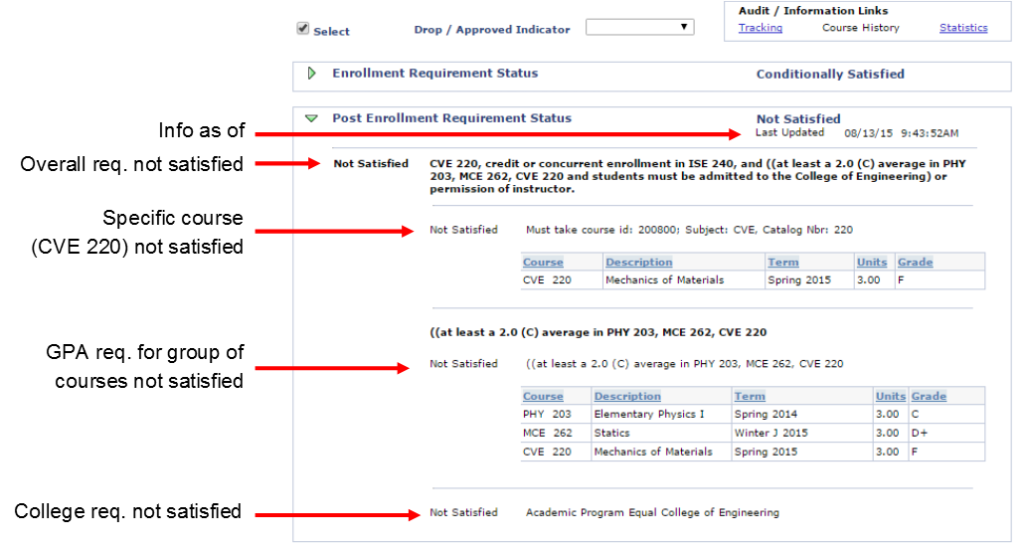
Definition of statuses under the Post Enroll Req Status column and shown on the details screen shown below.
“Overridden” means the requisite override tool was used to enroll the student in the course.
“Permitted” means the student used a permission number to enroll.
“Conditionally Satisfied” means the system is assuming the student will complete a pre-req successfully.
“Not Satisfied” means the student has explicitly not met at least one pre-req.
In the example below, the student did not earn a sufficient grade in CVE 220 and did not have a 2.0 GPA in PHY 203, MCE 262 and CVE 200 and the student’s academic program is not equal to the College of Engineering. In this example, students must be in the College of Engineering (not University College or another college) to take the course.
Click to enlarge
To return to the roster, click the dot to the left of Summary View (see below).

To drop students, please contact your Dean’s Office. Policy for drops varies by department and college.
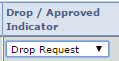
Generally speaking, for students to be dropped, you will select “Drop Request” from the drop-down menu to the right of those students to be dropped (see below.) You may select “Approved” for students approved to remain in the course. Be sure to click Save at the bottom once you are done setting drop requests.
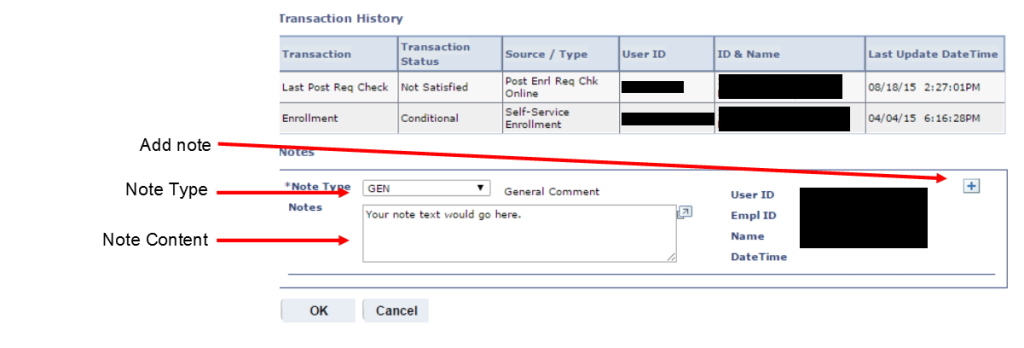
Tracking & Notes
Tracking provides information about how a student entered a course and lets you insert a note about the student. This is an excellent place to note why a student who does not meet the pre-reqs is being allowed to take the class.
To access this information click on to a student and then click “Tracking” in the Audit/Information Links box. (see screen shot below.)
To enter a note, select a note type from the drop down screen, enter your note in the “Notes” box and click OK. You can add an additional note by clicking the + button. (see below) Click OK to save the note.