UNDERGRADUATE, GRADUATE AND CERTIFICATE ONLINE PROGRAMS
Before Registering for a Class
- Visit your student center in e-Campus.
- Check for any holds that would prevent you from registering. (See below).
- Check for any “To Do” List items that would prevent you from registering by clicking “more” and then click the “To Do” Item in blue for detailed information.
- Students are asked to complete an annual mandatory Student Financial Responsibility Agreement during their career at URI. If you haven’t yet completed your Agreement, you will find it listed as an outstanding item in your To-Do list in e-Campus.
How to Register for Classes
All course registration is through e-Campus. The following directions will help you with registering for your classes. For guidance on which courses you should take, please contact your academic advisor.
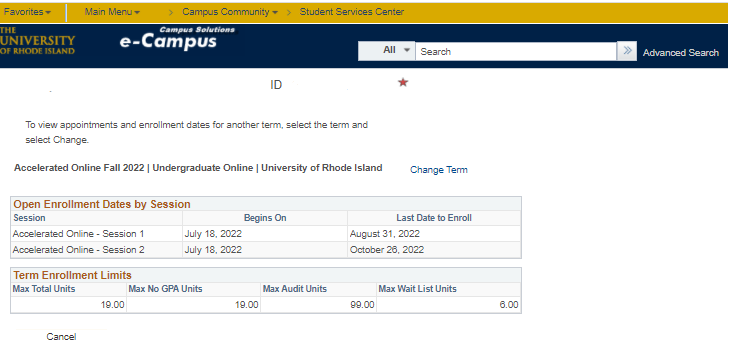
When You Can Register
- Check your appointment date by looking under the Enrollment Dates box (see below).
- Click details in the Enrollment Dates box or click.
- Select the term for which you want to register and click continue.
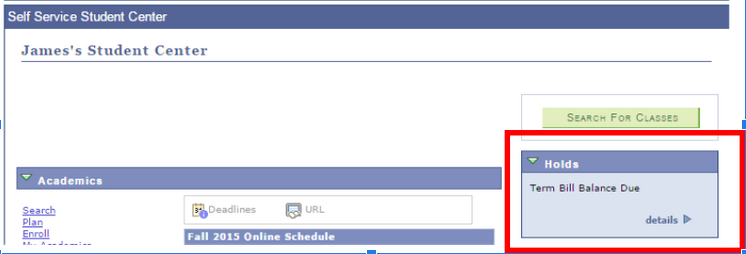
Check for Holds
A hold can prevent you from registering from a course.
- Log into e-Campus, in the upper right hand corner, click Home.
- Scroll down until you see the “Holds” box. In the example below, the student has a Term Bill Balance Due hold. Click Details to show more information. Then click the hold item name to show how to resolve the hold.
Add a Class
1. In e-Campus, in the upper right hand corner, click Home.
2. Scroll down and under “Academics,” click “Enroll.” Do not use the green “Search For Classes” button (see below).
3. On this page you are going to click on search. DO NOT enter a class number.
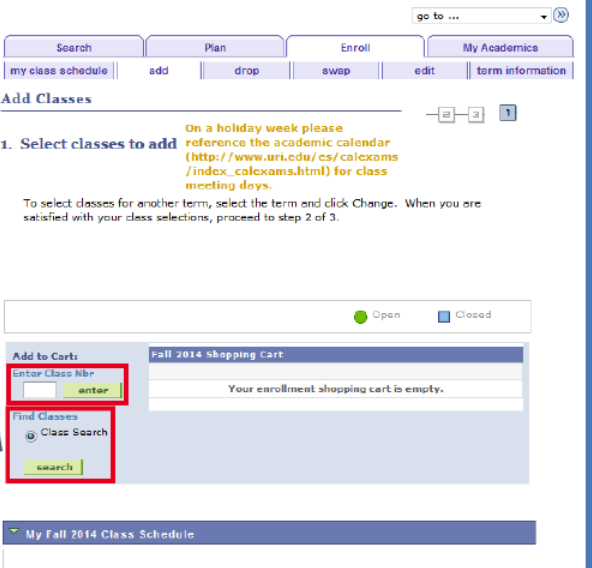
4. You may be asked to select a term for which to enroll. Select the appropriate term and click “Continue.”
5. Click the green “Search” button”
6. Enter your search criteria. Full names of Subject codes are listed in the Course Catalog. Once you have entered your criteria, click the green “Search” button.
7. A list of results will appear (see below). Click the blue link of the Class Number for additional information, including pre-requisites OR click the green “Select” button. If you click the “Select” button, skip to step 9.
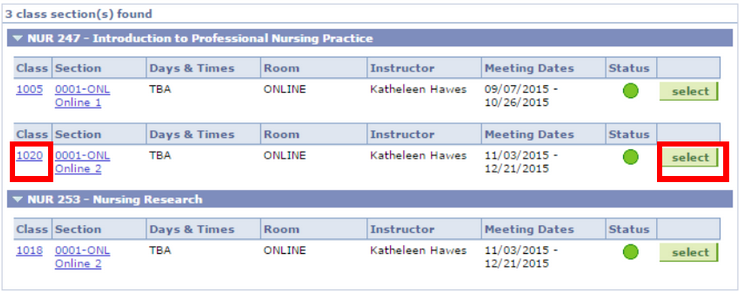
8. Click the green “Select Class” button to add the class to your shopping cart. Otherwise, click View Search Results to return to your results.
9. If you have a permission number, enter it into the Permission Nbr box.
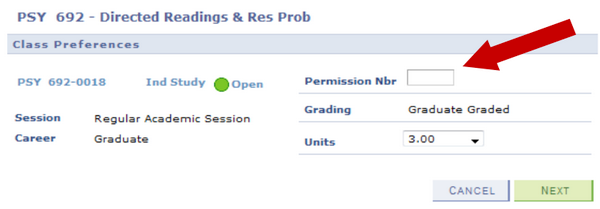
10. Click the green next button.
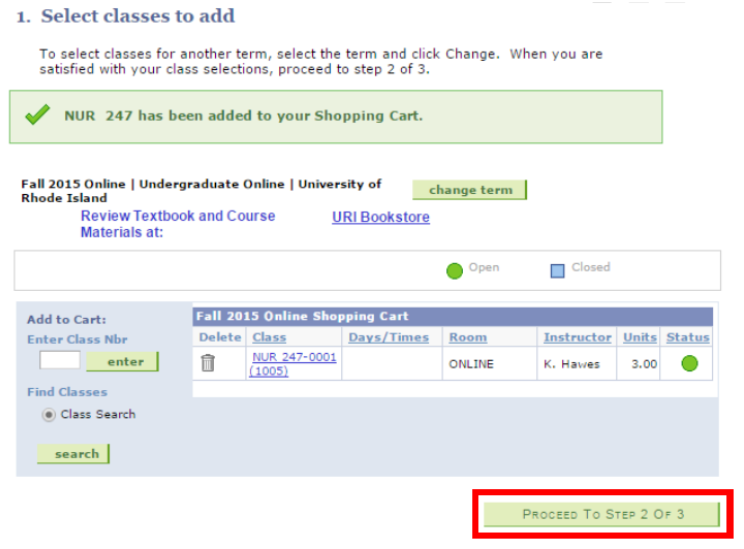
11. A confirmation message will display that the class was added to your shopping cart. You are not enrolled in the class yet! To add additional classes, click the green “Search” button and repeat steps 4-8.
12. Once you have added all classes to your shopping cart, click the green “Proceed to Step 2 of 3.”
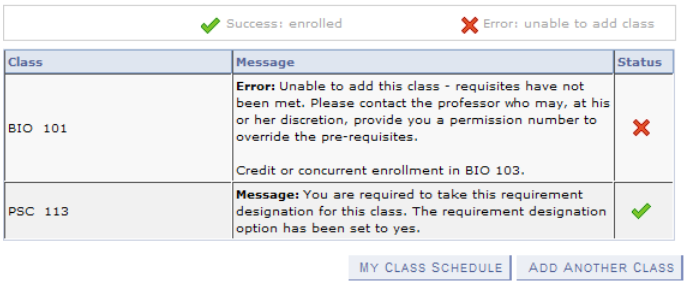
13. Click the green “Finish Enrolling” to finalize registration and check for errors (see below). A green check mark indicates you are registered. A red X indicates the class was not added to your schedule. (See common error messages and resolutions.)
Dropping a Class
Adjustment (refund) policy for dropped courses:
Courses must be dropped no later than 11:59pm on day 3 of the session to receive a 100% billing adjustment. There is no refund after day 3.
1. In e-Campus, in the upper right hand corner, click Home.
2. Scroll down and under “Academics,” click “Enroll.”
3. Click the drop tab at the top.
4. Check the box(es) next to the class(es) you wish to drop. (see below)
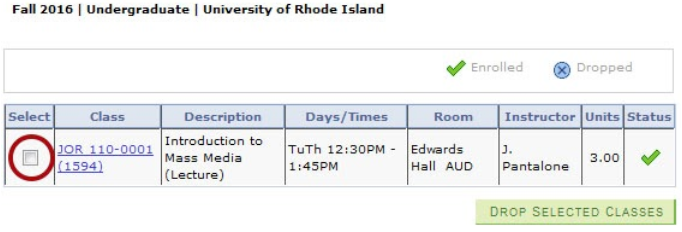
5. Click “Drop Selected Classes.”
6. Click “Finish Dropping.” A confirmation screen appears. A green check means the class was successfully dropped. A red “X” indicates the class was not dropped.