 Home
Home Browse
 Close
Close Events
 Maps
Maps Email
Email Brightspace
 eCampus


Garden to Plate
A master gardener’s primer on growing herbs and vegetables for your table—no green thumb or huge yard required.
By Kathryn Shanley
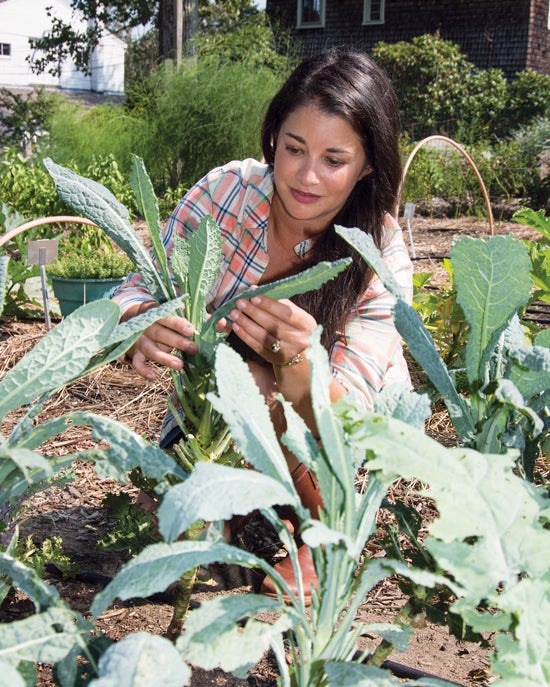
It’s true that Sejal Lanterman ’05 has a garden that’s been years in the making, but don’t let that put you off. The master gardener, who gives classes on everything from composting to food preservation, has one overriding message: Growing your own green stuff is easier than you think.
Yes, it will take a little planning, and a willingness to perform some mild physical labor. But, if you desire truly fresh food, there’s good news: It will basically grow itself. You just have to help it along the way. “Start small,” advises Lanterman, “be patient—and plant what you like to eat.”
Lanterman, whose father grew up in India, was brought up as a vegetarian in upstate New York. She came to Rhode Island for a degree in animal science, but after graduating, found her way to plant science instead. For the past eight years, she has been on the staff of the URI Extension Outreach Center, where she is the community engagement and outreach coordinator. In her current position she works with farmers and farmer-market managers, as well as teaches the public. Rhode Islanders know her as the Plant Pro host on NBC10 News, where she shares her knowledge and interviews URI Extension and local experts on gardening, composting and related topics (check out past episodes at turnto10.com—search for Plant Pro).
At home, she practices what she preaches, although she’s no zealot. “We try to have something we grew in every meal, but sometimes it’s as simple as a frozen herb,” she says of preparing food with her husband, who works at a nursery, and their two young sons. “Is growing everything the dream? Sure. But you know, it’s much better to just do what you know you can handle.” She notes that seeing their parents working in the garden sets a good example of “purposeful” work for her boys, but at the same time, “Having young kids, sometimes it’s all about how fast I can get this done.”
Getting started
The first step for the new gardener is deciding where to locate the garden. Select a level spot that gets at least six hours of sunlight a day and is close enough to the house for you to make quick trips to pick what you need. Stay away from trees or large shrubs because of their roots and the shade they cast. “Make sure you are near a water source,” notes Lanterman. “If you have to lug a hose too far you may become discouraged. I have my garden near where my children tend to play so that I can keep an eye on them while I’m working.”
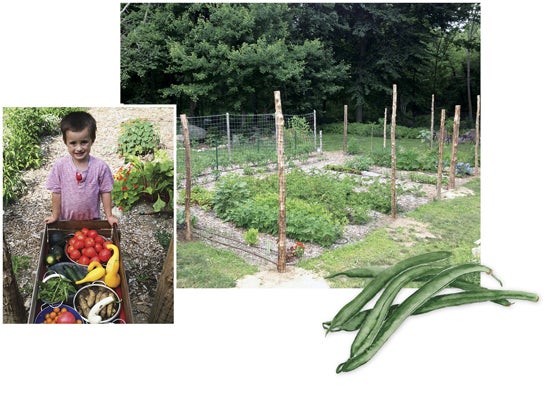
Once you have selected a site, remove any grass, weeds and stones, and turn over the soil to an ideal depth of 10 to 12 inches. If the soil is hard and rocky, or the area is prone to standing water, you may want to consider a raised bed with sides at least a foot above the ground. You can get material to build a raised bed at most hardware stores. In the spring, fill the bed with good quality garden soil from your local garden center.
After turning the soil, you’ll want to determine what type of soil you have. Take about a cup in total from different spots in the bed, seal it in a plastic sandwich bag and send it to a university extension program that offers soil testing (in New England, UMass and UConn are good options). For a fee, you will get a complete soil analysis and recommendations for what you need to do to improve it. Ideally, amend your soil in the fall so that the lime, fertilizer, compost or other materials have time to work in, and test again in the early spring. One important caution for vegetable gardeners is that manure (including dehydrated manure) should not be added in the spring for food safety reasons; add it only in the fall once harvesting period is over.
Gardening Tips
• Take periodic photos of your garden and make notes. This will help you as you plan for the following year.
• Weed a little every day or so to keepahead. Every time you walk past your garden, step in to pull some weeds and inspect the plants for any early signs of distress.
• The best time to plant is on a cloudy day or in the early evening, when the sun is lower in the sky. It’s less stressful for the plant, and more comfortable for the gardener.
• Clean out your garden at season’s end.
• Keep pets out of the garden.
• Wash your hands before and after gardening.
• Keep your tools clean.
• Try composting; your plants will love it. Get technical with tumblers and the right balance of green to brown; or, simply add worms, found at summertime farmers markets.
• Row covers are a great next step for many gardeners. No need to invest in fancy equipment, a roll of thin floating cover will extend your season from early spring to late fall.
Planting season
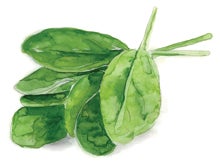
Decide what you want to plant. “It sounds basic, but choose vegetables that you like to eat and herbs that you routinely use,” Lanterman recommends. “Kale is an easy and attractive vegetable for a first-time gardener—but if you know you won’t eat it, don’t plant it.”
To save space, plant bush or dwarf varieties. “For first time gardeners, I suggest buying seedlings from a local garden center to get you off to a quick start,” she says.
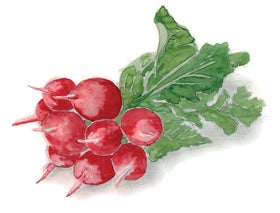
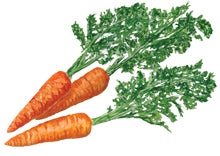
If planting seeds directly into the soil, wait until early June or when nighttime temperatures are 50° or higher. This is important for most summer crops including green beans, cucumbers, peppers, tomatoes and summer squash. Lettuce, radishes, beets, carrots and kale are cooler-weather crops and can be planted earlier. Check your state’s planting guide for a plant-by-plant guide for your area.
Design
“There is no right or wrong way to design your garden,” says Lanterman. Rows are most common but many people plant in clusters or randomly. What is important is to keep height and width in mind, so read the tags or seed packages for guidance on plant size and spacing.
Taller plants (including tomato and corn) will cast a shadow over lower plants, which can work to your advantage. For example, plant lettuce, a cool-weather crop that can tolerate some shade, near the tall tomato plants. But, regardless of how you lay out your garden, make sure you have space to get in to weed and water. To help control weeds, put straw or woodchips in pathways or open spaces in your garden.
Spice it up
Just like vegetables, when it comes to herbs, grow what you actually like. And while most vegetables are annual, growing and dying in a single season, herbs can be perennials, which live for years. “Perennial herbs tend to spread, so you might want to put them in a separate area or use containers,” suggests Lanterman. If your garden is far from your kitchen door, that’s another reason to plant herbs in containers, which you can place close to the house for easy snipping.
Watering
In addition to sunlight and healthy soil, your garden will need 1 to 2 inches of water per week. “Don’t guess,” advises Lanterman. “Every gardener should have a rain gauge.” You can find gauges at any hardware store, or make your own. If nature is not providing an inch of water in any given week, you will need to make up the difference. But bear in mind that overwatering is just as bad as underwatering, and is a common mistake made by new gardeners.
Be sure to water early in the morning, and water the base of the plant, not the leaves. Deep watering every few days is better for your plants than a light watering every day, and it’s easier on the person doing the watering. Lanterman notes that as your garden grows larger, a drip irrigation system (using soaker hoses snaked around the plants) is a timesaving solution for watering.
Got a Question?
Snap a photo with your smartphone and send it to gardener@etal.uri.edu. Trained URI master gardeners will help diagnose the problem and offer solutions.
Call the URI Gardening and Environmental Hotline during growing season, 9 a.m. to 2 p.m., 1-800-448-1011.
Walk in to the Outreach Center for free pH soil testing and in-person consultation at 3 East Alumni Avenue, Kingston, R.I. 02881, or use the same address to mail plants or insects for diagnosis and identification at the URI Plant Protection Clinic (cost is $10 per sample).
A planting calendar and other resources are available at web.uri.edu/ceoc.
Insects, pests and disease
Depending on where you live, animals can be your garden’s most frequent visitors—rabbits, deer and woodchucks are all part of the experience. If you are new to an area, check with your neighbors to see what to expect. The best way to keep animals out is to install some type of fencing: a do-it-yourself approach using chicken wire or deer fencing can do the job.
When it comes to insects, don’t be too quick to use chemicals; many insects are good for your garden because they are pollinators or they eat the “bad” insects. For example, parasitic wasps attack tomato hornworms.
If you think a plant has a disease, first identify what the disease is so that you can apply a plant-specific solution. Solving your problem can be as easy as consulting another experienced gardener or taking advantage of the services offered by the URI Extension Outreach Center to diagnose and safely treat plant disease.
Final words of wisdom
“Just get out there and do it,” says Lanterman. “Be patient and expect to make mistakes—that’s how you learn. Ask other gardeners for advice; we love to share our knowledge and experience. Gardening is work, but the payoff is the satisfaction of eating food that you grew yourself—and discovering how much better it tastes.” •